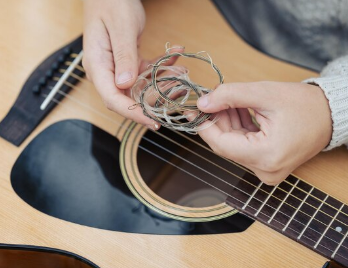
Easy Guide on How to Change Guitar Strings

Changing your guitar strings is a vital skill that every guitarist needs to master. Whether your strings have lost their tone, or broken, or you just want to experiment with different types, learning how to rest your guitar properly will improve both your playing experience and your instrument’s sound.
In this guide, I’ll walk you through the steps to change your guitar strings and explain how different string choices can impact your guitar’s tone.
Why Change Your Guitar Strings?
Over time, guitar strings lose their brightness, feel rougher under your fingers, and may even snap. Regularly changing guitar strings ensures the sound is fresh and stays in tune longer. For beginners, changing guitar strings can feel like a daunting task, but with practice, it becomes a quick and rewarding process.
Tools You’ll Need
Before we dive into the steps, gather these basic tools:
- New strings (make sure to choose the right gauge for your guitar)
- String winder (optional but helpful)
- Wire cutters (to trim excess string)
- Tuner (for accurate tuning after restringing)
- Cloth (to wipe the fretboard while the strings are off)
Step-by-Step: How to Change Guitar Strings
1. Loosen the Old Strings
Start by loosening the tension on the strings. You can do this by turning the tuning pegs counterclockwise until the strings are loose enough to remove. If you have a string winder, this will make the process faster.
2. Remove the Strings
Once the strings are loose, carefully unwind them from the tuning pegs and remove them from the guitar. For acoustic guitars, you’ll need to pull out the bridge pins (use a bridge pin puller or the notch on your string winder). For electric guitars, simply slide the strings out from the bridge.
3. Clean the Guitar (Optional but Recommended)
With the strings off, now’s a great time to clean your fretboard. Use a soft cloth to wipe down the fretboard and remove any dirt or grime that’s built up. This step helps maintain your guitar’s playability and appearance.
4. Insert the New Strings
Now it’s time to install your new strings. Start by inserting the string through the bridge. For acoustic guitars, place the ball end of the string into the hole and push the bridge pin back in. For electric guitars, thread the string through the body or bridge depending on your guitar’s design.
5. Attach the Strings to the Tuning Pegs
Pull the string up to the headstock and insert the end into the tuning peg’s hole. Leave a bit of slack so that you can wind the string around the peg. Start winding the tuning peg clockwise to tighten the string. The string should wrap neatly around the peg, ensuring the coils don’t overlap.
6. Tune the Guitar
Once all the strings are attached and moderately tightened, use a tuner to bring each string up to pitch. Don’t worry if the strings go out of tune quickly—new strings tend to stretch, and it may take a few rounds of tuning before they stay in tune.
7. Stretch the Strings
After tuning, gently stretch each string by pulling it up slightly along the neck. This helps the strings settle and stay in tune. Tune the guitar again after stretching.
8. Trim Excess String
Using wire cutters, carefully snip off the excess string at the tuning pegs. This keeps your headstock looking neat and prevents sharp ends from poking your fingers.
String Choice and Tone
Now that you’ve restrung your guitar, let’s talk about how different strings affect your tone.
1. Gauge
The gauge, or thickness, of the strings, has a major impact on both the feel and sound of your guitar:
- Light gauge strings (like .009 or .010) are easier to play, especially for beginners, as they require less finger pressure. They tend to produce a brighter, more delicate tone. However, they might lack the fullness of heavier strings and are more prone to breaking.
- Medium gauge strings (.011 to .013) offer a balance between playability and tone, providing a richer sound with more volume while still being manageable for most players.
- Heavy gauge strings (.014 and above) deliver a warm, robust tone with deeper bass and sustain, but they’re harder on the fingers and may require some adjustment to your guitar’s neck to accommodate the extra tension.
2. Material
The material of the guitar strings also significantly influences your guitar’s tone:
- Nickel-plated steel strings are common on electric guitars. They provide a bright, crisp tone with a good balance between warmth and bite.
- Phosphor bronze strings are popular for acoustic guitars, producing a rich, warm tone with good resonance. They’re perfect for strumming and fingerpicking alike.
- Coated strings are treated with a thin layer of polymer to extend their lifespan. While they last longer, some players feel they lack the brightness and “feel” of uncoated strings.
3. Winding
The winding method affects both the tone and feel of the strings:
- Roundwound strings are the most common and provide a bright tone with lots of texture under your fingers.
- Flatwound strings are smoother and offer a darker, more mellow tone, often used in jazz or blues music.
Final Thoughts
Changing your guitar strings might seem intimidating at first, but with practice, it becomes second nature. Remember that restringing regularly keeps your guitar sounding its best and allows you to experiment with different string types. Whether you prefer a bright, crisp tone for intricate fingerpicking or a deeper, warmer sound for heavy strumming, the guitar strings you choose will shape your instrument’s voice. Happy playing!
If you’re interested in learning an instrument, at Real Brave, we offer an incredible experience like no other place in music lessons for kids and adults by guiding them from the beginning stages of getting to know an instrument all the way through performing for family and friends on stage. Our instructors come from all over the world, bringing extensive experience on a wide range of instruments. Click below and book a free lesson with us!
Author: Daniel Powers Jr, the founder of Real Brave™, serves as the chief inspiration to thousands of students in the Real Brave music instruction program. He’s also the visionary behind PracticePad™, an online platform for live one-on-one online music lessons, lesson tracking, and scheduling. Beyond his entrepreneurial pursuits, Daniel leads a non-profit organization that provides formerly homeless children with access to music education, making a profound impact on their lives. His unwavering dedication to music, innovation, and education continues to inspire individuals to reach their fullest potential while creating positive change in communities. Follow Real Brave on all the socials:
youtube.com/@realbraveinc
twitter.com/realbraveinc
https://www.tiktok.com/@realbraveinc
instagram.com/realbraveaudio
facebook.com/realbraveinc


